
A Tramex moisture meter earns its place when it helps you find the wet area, track the dry and leave a record that someone else can follow. The meter alone does none of that automatically. You still need a repeatable inspection method, suitable reference points and a drying plan.
For Australian water damage technicians, builders and flooring contractors, the practical choice is between a focused dual-meter kit and a broader system with environmental monitoring and probes. The right option depends on your materials, concrete workload, and documentation and monitoring requirements.
This guide compares the Tramex Water Damage Restoration Tech, Inspector and Master kits listed by Restoration Warehouse. Product inclusions and functions below come from the current product pages; confirm the live listing and manufacturer instructions before buying or using a meter. No reading, on its own, is a universal pass/fail answer for every material or job.
Start with the question the meter must answer
Water damage work usually involves three related but different questions. Where is moisture likely to be present? How do conditions change during drying? What evidence supports the final drying decision? A fast survey tool suits the first question, while monitoring and verification can require additional instruments and methods.
Do not begin with the largest kit. Begin with your normal jobs. A crew mainly mapping plasterboard, timber and other building materials has a different requirement from one regularly assessing concrete slabs or maintaining environmental records between site visits. Buying every accessory does not remove the need to understand what each measurement represents.
Also decide who will use the equipment. A consistent kit helps when several technicians share the work. More functions add capability, setup, handling and reporting steps.
What a pinless moisture meter does well
A pinless moisture meter lets you scan a surface without driving pins into it. That makes non-destructive instruments useful for surveying walls, floors and other building materials, particularly when you need broad coverage or want to avoid marking a finished surface. The Tramex ME5 in the kits below is listed for non-destructive quantitative testing of wood and comparative testing of materials including drywall, plaster, brick, tiles, resilient flooring, laminates and roofing.
Those different measurement descriptions matter. Do not carry a number or threshold from one material scale across to another. Use the scale and method specified for the material, follow the manufacturer’s instructions, and interpret comparative readings comparatively. Surface coverings, nearby materials and the depth being assessed can all influence what a reading means.
A pinless scan is a survey method, not X-ray vision. Anomalies should be checked against the room, the water event and other appropriate measurements. Where the result is unexpected, inspect further rather than forcing it to fit your assumption.
Scan systematically, not just where the damage is obvious
Work in a pattern you can repeat: walls in a consistent direction, floors on a sensible grid, and particular attention to joints, edges, skirtings and transitions where the loss may have spread. Include apparently unaffected areas rather than limiting the survey to visible staining. Record the locations so the same points can be revisited.
Mark or photograph reading locations without damaging the customer’s finish. A room sketch with stable reference points is often more useful than a collection of unattached numbers. If you move furniture, floor coverings or equipment between visits, note that too; changing site conditions can otherwise look like a drying trend.
Concrete needs its own measurement method
A concrete moisture meter should not be treated as simply another general building-material scale. Concrete assessment has its own methods, limitations and reporting requirements. The Tech Kit pairs the ME5 with the CME5; the Inspector and Master kits use the CMEX5 alongside the ME5. Check the exact meter and method in the kit you are considering rather than assuming the model names are interchangeable.
The current listings describe non-destructive concrete assessment and comparative testing using a gravimetric baseline with reference to ASTM F2659. The Inspector and Master listings also describe in-situ RH testing capability with reference to ASTM F2170. Those are different pathways. Choose the method required by the project or flooring specification, then follow its preparation, placement, equilibration and documentation requirements.
For a slab being prepared for flooring, confirm what the installer, adhesive or coating manufacturer and project specification actually require. A quick surface survey may help locate areas for further investigation, but it should not be substituted for a specified in-situ test. Our concrete moisture meter guide looks at that distinction in more detail.
Build a dry reference before chasing a target
“Dry” needs context. Start by identifying suitable unaffected material of the same type and, where practical, in similar conditions. Use that reference alongside the applicable standard, work order, manufacturer guidance and professional judgement. A single generic target across plasterboard, timber and concrete is not a sound verification method.
Take baseline readings before or as the drying setup is established, then monitor at consistent locations and intervals. Look for trends as well as individual values. If readings stall, rise or spread into another area, reassess water migration, the drying setup, unresolved ingress and the measurement method. Do not simply move the meter until it finds a nicer number.
Photographs, room notes and environmental records add the context a number cannot carry. Record the meter, scale or method, material, location, date and relevant site conditions. This makes handovers clearer and helps explain why equipment was adjusted or removed.
Our broader guide to choosing a moisture meter for restoration and flooring work covers meter selection across different materials. For the complete monitoring loop, see Structural Drying: Measure, Dry, Verify.
Compare the three Tramex water damage kits
Tech Kit WDTK: focused non-destructive surveying
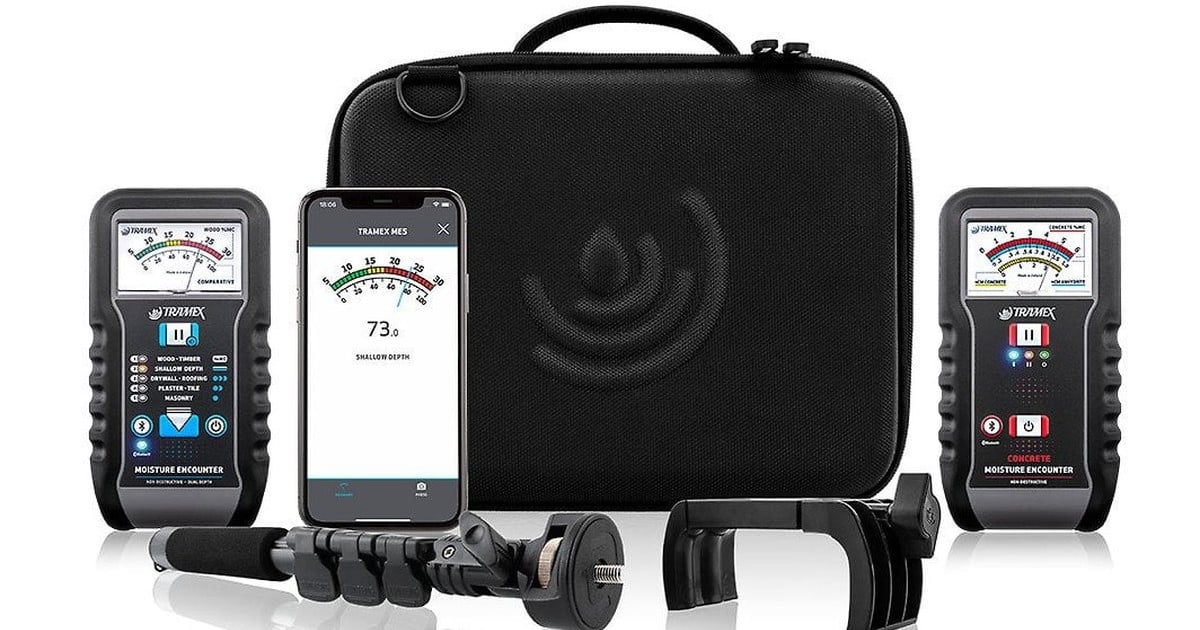
The Tramex Water Damage Restoration Tech Kit WDTK is the focused dual-meter option. Its current listing includes the ME5 and CME5, an extension handle and a Tramex carry case. It is described for non-destructive testing of moisture conditions in concrete, wood and a range of building materials.
The listing also includes Bluetooth connectivity with the Tramex Meters App for visualising readings, reporting, GeoTagging, charts and photo documentation. That combination suits a crew whose core requirement is non-destructive material surveying across general building materials and concrete, with app-based records, without stepping straight into the broader probe and datalogger package.
Do not assume it includes the probes or datalogger named in the larger kits. Review the live kit-contents list against the methods your work order calls for.
Inspector Kit WDIK: add monitoring and probe-based assessment
The Tramex Water Damage Restoration Inspector Kit WDIK combines the CMEX5 and ME5 with the DL-RHTX feedback datalogger. The listing describes spot testing plus continuous monitoring of ambient relative humidity, temperature and dew point, alongside non-destructive material assessment.
Its listed contents add a heavy-duty pin-type wood probe, insulated pins, a short narrow relative humidity probe, calibration check salts, an infrared thermometer and an extension handle. The listing describes in-situ RH testing capability and Bluetooth app reporting.
This is the option to assess when your work needs more than non-destructive scanning and you want environmental logging and probe accessories in one kit. Confirm that the exact RH probe arrangement suits your specified method; “Inspector” in the name does not make every listed accessory interchangeable with the Master Kit.
Master Kit WDMK: the broader listed system
The Tramex Water Damage Restoration Master Kit WDMK also combines the CMEX5, ME5 and DL-RHTX. Its current listing includes a heavy-duty pin-type wood probe, 200 mm insulated pins, a 260 mm narrow-wand RH probe, one Hygro-i2 relative humidity probe, hole liners, calibration check salts, an infrared thermometer and an extension handle.
The product page describes non-destructive, comparative and in-situ RH methods, environmental monitoring and app-based reporting. It is the broader listed package for crews that need those additional components and will actually use them in a documented workflow.
Compare the Inspector and Master contents line by line before deciding. The useful difference is not the word “Master”; it is whether the listed probes, liners and other inclusions match the assessments you perform.
Turn readings into a defensible job record
Bluetooth and app features can help organise readings, maps, charts, photographs and location information, but software does not validate a poor inspection. Set up a consistent naming convention for sites, rooms and reading points. Check that each technician uses the intended material scale and records enough information for another person to reproduce the measurement.
Save the report with the job file rather than leaving it on one technician’s phone. Include limitations: inaccessible cavities, coverings that prevented a direct assessment, missing reference material or methods outside the crew’s scope. Where a specified test or invasive investigation is needed, escalate it instead of presenting a screening result as conclusive.
A clear record should show what was wet or anomalous, how the drying setup responded, what was monitored and why the final decision was made. It should not rely on phrases such as “felt dry” or “meter was fine”.
A practical buying checklist
Before choosing a kit, write down:
- Materials: Which timber, plasterboard, masonry, concrete and finished surfaces do you regularly inspect?
- Methods: Do you need non-destructive scanning, pin measurement, in-situ RH testing or a combination specified by the work?
- Monitoring: Will ambient RH, temperature and dew point logging improve your actual drying workflow?
- Reporting: Who needs the records, and how will maps, photographs and readings be stored with the job?
- Kit contents: Does the exact listed package include every probe, liner or accessory your method requires?
- Training: Can every technician explain the selected scale, limitations and reference method?
- Care: How will the meters and probes be stored, checked and maintained under the manufacturer’s instructions?
If two kits cover the required methods, choose the one your team can use consistently. An unused function adds no value to a drying report.
Browse the current range
You can compare these kits with the wider moisture meters and monitoring range at Restoration Warehouse. Open the individual product page for current inclusions and availability, and use the manufacturer’s instructions for setup and operation. If you are unsure which measurement method a job requires, resolve that before selecting the kit.
Bottom line
Choose a Tramex moisture meter kit around material, method, monitoring and reporting. The Tech Kit is the listed ME5/CME5 non-destructive surveying package. The Inspector and Master kits add the CMEX5, environmental datalogging and probe-based accessories, with different detailed contents. None replaces a drying plan or a specified test method. Map consistently, use appropriate references, verify with the required method and keep a record another technician can understand.
