
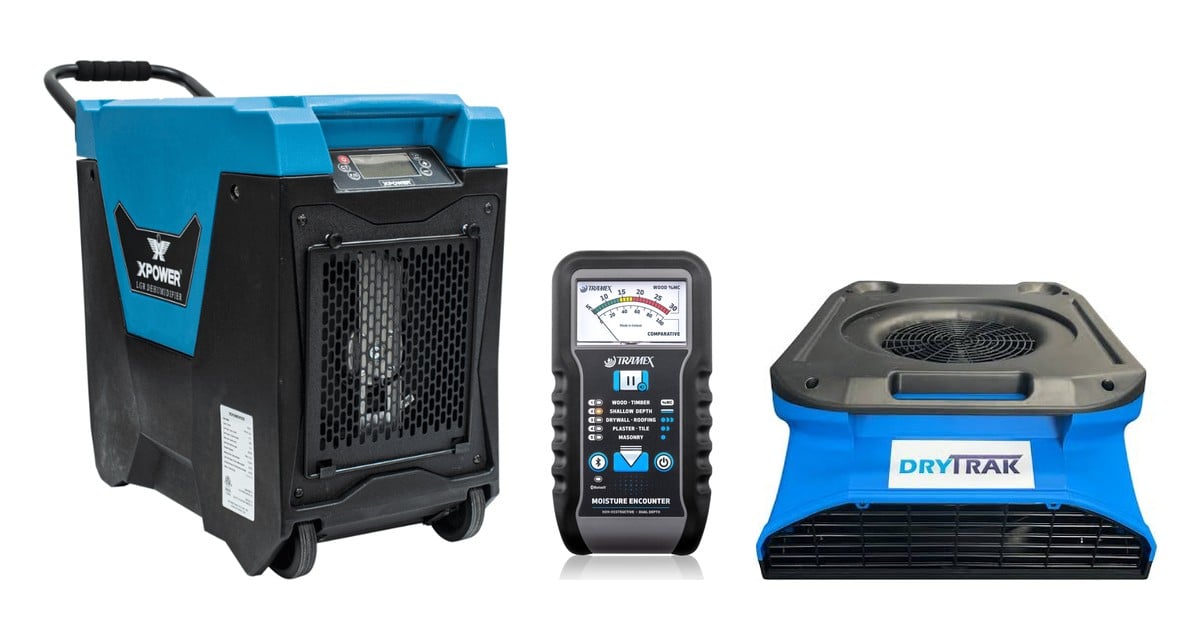
Structural drying is not about how many fans you can fit in the van. It is a loop: measure what is wet, set up drying equipment to suit, then prove the materials are dry before you pull the kit. Skip the first step and you are guessing. Skip the last step and you are handing the builder or insurer a job you can’t back up.
This guide walks through that loop and the equipment that does each part of it. If you are still choosing individual pieces of kit, our deeper buying guides are linked along the way: the moisture meter guide, the dehumidifier guide, LGR vs desiccant vs conventional and learn more about air movers. This post is about how they work together on a job.
Step 1: Measure before you place a single fan
Map the wet area
The first job on site is a moisture map. You want to know where the water went, not just where it is visible. Water tracks under skirting, wicks up plasterboard and sits in subfloors long after the surface feels dry.
A pinless meter is the fast way to do this because you can scan walls and floors without putting holes in them. The Tramex ME5 Moisture Encounter is built for exactly that. Its product page lists:
- Pinless, non-destructive measurement
- Dual depth scanning, up to 9 mm shallow and 30 mm deep
- Pre-calibration for drywall, plaster, roofing, tile and masonry, plus a wood moisture content range of 5 to 30% MC
- Reading through paint, wallpaper, flooring, tiles and roofing materials
- Bluetooth to the Tramex Meters App for moisture mapping, reports, charts, photos and GeoTagging
The dual depth matters on a drying job. Comparing a shallow and a deep reading on the same spot helps you tell surface moisture from water sitting further into the material.
If you want the room conditions in the same tool, the Tramex MEX5 adds a built-in hygrometer for ambient RH and psychrometric values, an infrared surface thermometer, and compatibility with external in-situ RH probes and pin probes. Its listed applications include structural drying verification.
Record a dry standard
Before you start drying, take readings on unaffected material of the same type in the same building. That gives you a reference point for each material, so “dry” means something you measured rather than something you felt. Log the readings against a sketch or photo of the room. The Tramex app’s mapping and photo documentation makes this part quicker, and it is the record you will compare against later.
Read the air, not just the walls
Drying is driven by the air around the wet materials, so record the starting conditions too: temperature, relative humidity and dew point. The Tramex IRT2DP measures surface temperature, ambient temperature, RH and dew point in one handheld unit. Its tricolour LED and audible alert warn when a surface is approaching dew point, which is a useful condensation and mould risk check on cold walls and slabs.
When a kit makes more sense
If you are setting up a restoration van from scratch, a kit is often simpler than buying piece by piece:
- Tramex WDTK Water Damage Restoration Tech Kit: pairs the ME5 with the CME5 concrete moisture meter, plus an extension handle, in a carry case. The CME5 tests concrete non-destructively, using gravimetric testing as a baseline and comparative testing per ASTM F2659.
- Tramex WDMK Water Damage Restoration Master Kit: combines the CMEX5 and ME5 with the DL-RHTX feedback datalogger for ambient RH, temperature and dew point. It also includes a Hygro-i2 RH probe and hole liners for in-situ concrete testing, a 200 mm insulated-pin wood probe, a narrow wand RH probe, an infrared thermometer and calibration check salts.
The full range is in our moisture meters category.
Step 2: Set up the drying
Once you know what is wet and how wet, the drying setup has two jobs. Air movers lift moisture off the wet surfaces into the air. Dehumidifiers take that moisture out of the air so it doesn’t settle back into the building. One without the other doesn’t work well: fans alone push humid air around a closed room, and a dehumidifier alone waits for slow evaporation.
Contain the area
Drying is far more efficient in a defined space. Close doors, and where the wet zone is part of a bigger open area, section it off. Our dust containment guide covers zip doors and pole systems that also work for drying chambers.
Place the air movers
Air movers go where the moisture map says the water is. Aim airflow across wet floors and along the base of wet walls rather than into the middle of the room. RW also stocks heated drying mats. The two DryTrak models RW stocks cover most setups:
- DryTrak Radial Air Mover Low Profile: 700 to 900 CFM, 2-speed, 0.7/0.9 A amp draw and 8 kg. It has a low-profile body with multiple drying angles for directing air across floors, under surfaces and along walls. It is stackable and can be daisy chained, which suits multi-room jobs, hallways and tight spaces.
- DryTrak Axial Air Mover 4000 CFM: up to 4,000 CFM, 2-speed, 0.6 A on low and 1.3 A on high, and 16 kg with an adjustable stand. The stand lets you point airflow at floors, walls, ceilings and cavities. It suits larger open areas and high-volume air movement.
Both are SAA certified. On a big job, check amp draw against the circuits you have. Low-draw units mean more air movers per circuit before you trip anything. Browse the full air movers and drying fans range, and if you are deciding between a carpet dryer and an air mover, see carpet dryer vs air mover.
Size the dehumidification
An LGR (low grain refrigerant) dehumidifier is the standard tool for most structural drying in Australian conditions. LGR units are built to keep pulling moisture as the humidity in the room comes down, which is exactly what happens as a job progresses. Our LGR vs desiccant vs conventional guide covers when another type fits better.
RW stocks three LGR units:
- XPOWER XD-85LH: 41 L per day at AHAM (27°C, 60% RH) and up to 69 L per day at saturation (32°C, 90% RH), with 306 m³/h airflow. It draws 3.7 A and has an auto purge pump with a 12.2 m drain hose, automatic speed control and a digital display for humidity and run time. It stacks up to three high.
- Dri-Eaz BD2500: 36 L per day AHAM and 63 L per day max, a 3.4 A draw and automatic pump out. It shows real-time inlet and outlet temperature and RH on the touchpad, which is handy for checking the unit is doing its job. It has an adjustable 30 to 90% humidistat, an hour counter and a kilowatt hour counter, and it is stackable with a compact footprint for confined areas.
- DryTrak Mini Upright LGR 50L: up to 50 L per day (30°C at 80% RH) at 3.1 A and 750 W. It has an integrated condensate pump, a continuous drain option, automatic defrost, and wheels with a foldable handle for moving through homes, apartments and hallways.
Run the condensate pump hose to a drain or outside so the unit can work overnight without filling up. For more detail on choosing between units, see how to choose a dehumidifier for restoration drying or browse the dehumidifiers category.
Step 3: Monitor the drying
Drying equipment doesn’t finish a job by itself. Check in at least daily. Take moisture readings on the same mapped points, and take temperature and RH readings in the drying area and outside it. If materials are not trending down, change something: move air movers, add dehumidification or tighten the containment.
Remote monitoring saves trips. The Tramex TREMS-5 Remote Environmental Monitoring System comes with five CS-RHTA cloud sensors and a Tramex Cloud Station. The sensors send RH, temperature, dew point and grains per pound / grams per kilo to the Tramex Cloud platform, which can notify you of adverse conditions. The product page says there are no subscription fees. The same system comes in larger sensor counts in our hygrometers and environmental monitoring range.
Step 4: Verify dry before you pull the kit
This is the step that protects you. Go back to every mapped point and take final readings with the same meter, then compare them to the dry standard you recorded on day one. Only when the affected materials match the unaffected reference should the equipment come out.
Save the readings, photos and maps from the Tramex app with the job file. That record is what you show the builder, the flooring installer or the insurer when someone asks how you know it was dry. For slabs going under new flooring, in-situ RH testing with Hygro-i2 probes, as included in the WDMK, gives the flooring trade the numbers they will ask for.
Quick structural drying checklist
Measure
- Map moisture with a pinless meter at shallow and deep settings
- Record dry standard readings on unaffected material
- Log temperature, RH and dew point inside and outside the area
Dry
- Contain the drying area
- Place air movers across wet floors and wall bases
- Run LGR dehumidification with the drain hose set up
- Check circuit capacity against total amp draw
Monitor
- Re-read the mapped points daily, or watch remote sensors
- Adjust the setup if readings stall
Verify
- Final readings match the dry standard
- Save maps, readings and photos to the job file
Don’t own enough kit for a big job?
Storm season and large losses can outrun any fleet. If you need extra drying equipment for a short period, see our storm and flood drying hire options. Our storm season stock check covers the consumables worth having on the shelf before the rain starts.
Build your drying setup with Restoration Warehouse
RW stocks the Tramex meters, LGR dehumidifiers and DryTrak air movers covered here. Browse the restoration drying range, or contact the team if you want help matching meters, dehumidifiers and air movers to the jobs you take on.
